


DaVinci Resolve Power Bins are a persistent storage area in the Media Pool that keeps assets accessible across all projects on your system. Unlike the regular Media Pool, which is scoped to a single project, Power Bins survive project switches — making them the right place to store any media you reuse consistently: logos, music beds, lower third templates, sound effects libraries, and brand motion elements.
If you upgraded to Resolve 18 or later and can’t find Power Bins where they used to be, that’s a common point of confusion. The menu location changed. This guide covers where to find them, how to set them up effectively, and how to integrate them into a production workflow.
What Power Bins are (and what they’re not)
Power Bins appear in the Media Pool as a persistent folder structure that’s visible regardless of which project you have open. They’re stored at the database level, not the project level — which is what makes them cross-project.
They are not:
- A backup system. Power Bins reference your media at its original location. If you move or delete the source files, the references break. Always keep Power Bin source media in a stable, permanent location.
- A collaboration sync tool. On a standard DaVinci Resolve install, Power Bins are local to the machine running the database. If your team shares a DaVinci Resolve PostgreSQL database across multiple workstations, Power Bins can be shared — but this requires a shared database configuration, not just a local install.
- A replacement for proper project organization. Power Bins store frequently reused assets. Project-specific media still belongs in the project’s Media Pool.
Where to find Power Bins in DaVinci Resolve 18 and later
In Resolve 17 and earlier, Power Bins were accessible via View → Show Power Bins in the menu bar. That option was removed in Resolve 18.
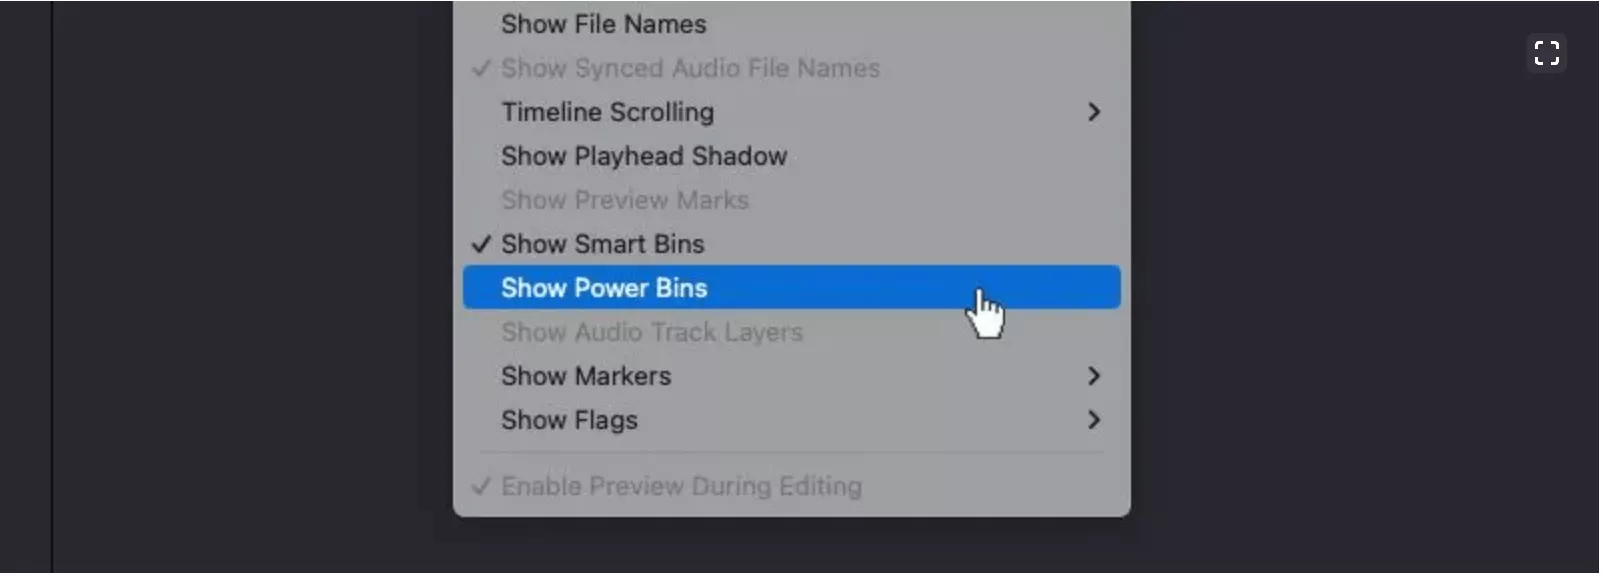
In Resolve 18 and later:
- Open the Cut, Edit, or Media page
- Look at the Media Pool panel
- Click the ellipsis (⋯) menu at the top of the Media Pool panel
- Select Show Power Bins
Power Bins will now appear as a section in the Media Pool below your regular project bins. They persist across sessions — you won’t need to enable them again once they’re turned on.
If you’re on the Media page, you may need to first make sure the Media Pool panel is visible. Use Shift+2 to toggle the Media Pool view if it’s collapsed.
How to add assets to Power Bins
Once Power Bins are visible in your Media Pool, adding assets is straightforward:
Method 1: Drag and drop from your file system
Select files or folders from your computer’s file system and drag them directly into the Power Bins area in the Media Pool. Resolve links to the files at their current location.
Method 2: Import from within the project
Right-click inside the Power Bins area and select Import Media (or use the keyboard shortcut Cmd+I / Ctrl+I). Navigate to your media and import it directly into Power Bins.
Method 3: Move from project Media Pool to Power Bins
In your current project, right-click a clip in the Media Pool and select Move to Power Bins. The clip moves from the project-scoped Media Pool into the persistent Power Bins area.
One important limitation: If you drag a clip from your timeline directly to Power Bins, DaVinci Resolve does not preserve any adjustments you’ve made — color grade, audio edits, speed adjustments are all stripped. If you want to archive a graded or adjusted clip to Power Bins, render it to a new file first and add the rendered output.
How to organize Power Bins effectively
Power Bins support sub-bins, so you can create a folder structure that works for your production volume. A practical starting structure:
Power Bins
├── Brand Assets
│   ├── Logos
│   ├── Lower Thirds
│   └── End Cards
├── Music Library
│   ├── Royalty-Free Beds
│   └── Licensed Tracks
├── Sound Effects
├── Motion Templates
│   ├── Titles
│   └── Transitions
└── Client-Specific
    ├── Client A
    └── Client B
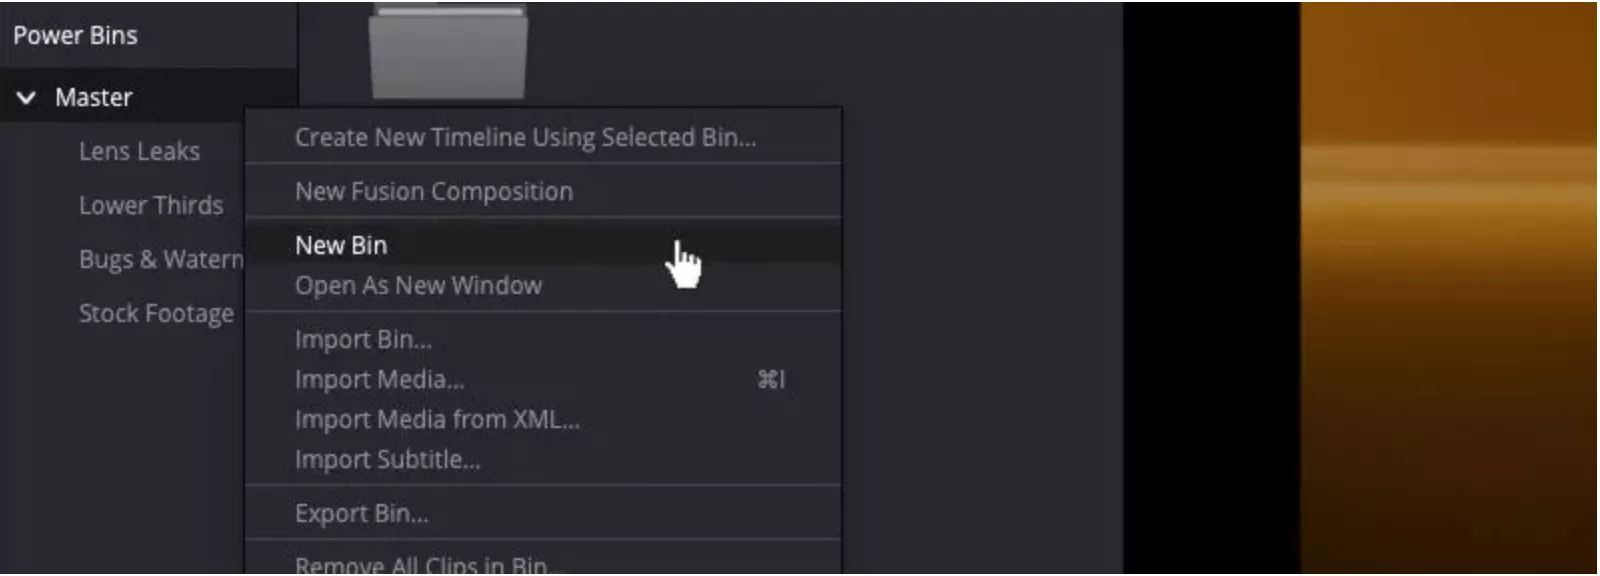
Create sub-bins by right-clicking inside the Power Bins area and selecting New Bin. Rename bins by double-clicking the name.
For editors working across multiple clients, the client-specific sub-bin structure is particularly useful: logos, brand fonts, and approved music that’s licensed for a specific client stays organized and immediately accessible without hunting through project folders.
Power Bins vs. Smart Bins: what’s the difference
DaVinci Resolve has two types of special bins that editors often confuse:
| Power Bins | Smart Bins | |
|---|---|---|
| What they do | Store assets across all projects | Auto-populate based on metadata rules |
| Persistence | Across projects | Within project (but rules persist) |
| What goes in them | Manually added assets | Dynamically filtered clips (by codec, resolution, keyword, etc.) |
| Best use | Shared reusable assets | Organizing large media pools automatically |
| Found at | Enabled via Media Pool ellipsis menu | Same media pool, separate section |
Use Power Bins for reusable assets. Use Smart Bins to automatically organize large camera card imports or mixed-format media.
Integrating Power Bins into a multi-editor production workflow
For solo editors, Power Bins are a personal productivity tool. For teams running a shared DaVinci Resolve database (PostgreSQL), Power Bins become a shared asset library accessible to all editors on the network — a significant workflow advantage.
On a shared database:
- Brand assets updated once in Power Bins are immediately available to every editor on the network
- Music and sound effects libraries don’t need to be duplicated per editor
- Approved motion templates roll out to the team instantly
The tradeoff: managing a shared Power Bins structure requires discipline. If anyone can add to it without curation, it becomes a second disorganized media pool. Assign one person responsibility for maintaining the Power Bins structure and establish clear criteria for what belongs there.
From assembly to review: the post-Power Bins workflow
Power Bins solve asset management at the beginning of the edit. The other side of the workflow — getting cut sequences reviewed and approved — is where many productions lose time.
Once an edit is assembled and ready for review, the sequence needs to go to directors, producers, clients, or brand stakeholders for feedback. The standard process (export → email → get back a list of time codes → decode feedback → revise) can take days per round.
Krock.io’s DaVinci Resolve integration connects directly to the review workflow: export from Resolve, upload to Krock.io, share a review link. Reviewers leave frame-accurate annotations at the exact moment they want to address — no time code lists, no email threads. The editor opens the video proofing interface and sees every note in order, tied to the timeline position where it belongs.
A complete DaVinci Resolve review workflow covers this full pipeline: from media ingest through Power Bins organization to review, revision, and final delivery.
Common Power Bins questions
Why can’t I see Power Bins in my Media Pool?
They’re turned off by default. Enable them via the ellipsis (⋯) menu in the Media Pool panel header.
Do Power Bins sync across machines?
Not automatically on a local database. You need a shared PostgreSQL database configured across your workstations for Power Bins to be shared across editors.
What happens to Power Bins assets when I update DaVinci Resolve?
Power Bins data is stored in the database, not the application. As long as your database is preserved, Power Bins survive application updates.
Can I use Power Bins with DaVinci Resolve’s free version?
Yes. Power Bins are available in both the free and Studio versions of DaVinci Resolve.
If I delete a file from Power Bins, does it delete the source media?
No. Removing a clip from Power Bins removes the reference. The source file remains on disk where it was originally stored.
Conclusion
Power Bins are one of DaVinci Resolve’s most useful but least-documented features. For editors working across multiple projects, a well-organized Power Bins library reduces setup time per project and keeps frequently used assets consistently accessible.
The key practices: find them via the Media Pool ellipsis menu in Resolve 18+, keep source media in stable locations, build a logical sub-bin structure, and render to file before adding adjusted clips. Done right, Power Bins become an invisible efficiency layer that saves real time across every project.
Working in DaVinci Resolve and need a faster review and approval workflow? Try Krock.io free — frame-accurate annotations, no credit card required.