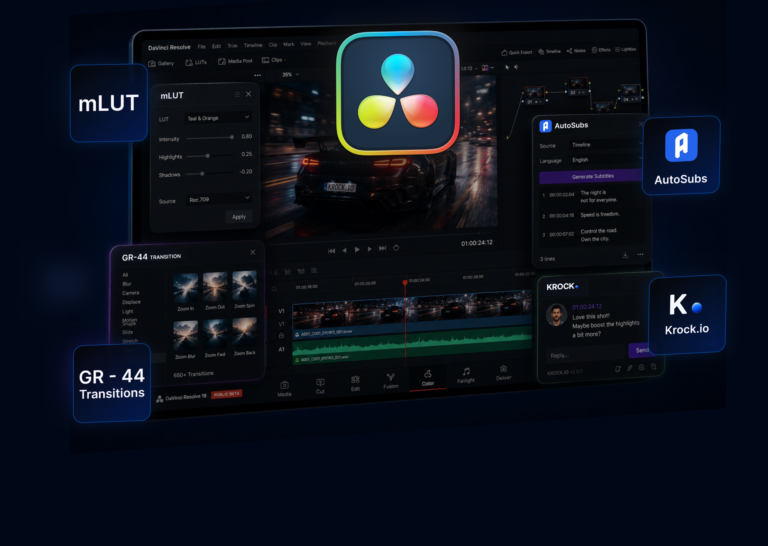



The best free DaVinci Resolve plugins in 2026 are Reactor (package manager), AutoSubs (AI subtitles), mLUT (LUT management), ReaPlugs (professional audio), GR-44 Transitions (630+ transitions), and Krock.io (frame-accurate client review). This guide covers them in five categories: editing, color grading, motion graphics, audio, and client collaboration, all free and compatible with DaVinci Resolve 19.
Every editor who switches to DaVinci Resolve has the same experience: they spend a week exploring what it does natively, feel impressed, and then stop there. The plugin ecosystem sitting underneath it goes completely untouched.
That’s a significant amount of free capability going to waste. The best free DaVinci Resolve plugins in 2026 add AI subtitles, professional color tools, client review workflows, and studio-grade audio processing that would have required separate software subscriptions three years ago. Most of them install in under five minutes.
This list covers 15 plugins worth your time, organized by what they actually fix in your workflow. No paid tools dressed up as free trials. No plugins that only work on Resolve 17. Just tools that are actively maintained and genuinely free. Plugins only go so far, so pair them with a few editing tricks that speed up your workflow.
What’s in this list:
- Editing and workflow tools that remove busywork
- Color grading plugins that speed up the grade
- Motion graphics and transitions that hold up in client deliverables
- Audio cleanup tools that work natively in Fairlight
- A collaboration plugin that kills the email feedback loop
Want to see the Krock.io review workflow in action before reading the full list? Explore the DaVinci Resolve integration to understand how frame-accurate client feedback connects directly to your timeline.
What Makes a Free Plugin Worth Installing?
Not every free plugin is worth the install time. Some conflict with Resolve’s native GPU rendering. Some haven’t been updated since Resolve 16 and crash silently on newer builds. A plugin worth having does one thing well, plays nice with your existing timeline, and doesn’t require babysitting.
The tools on this list meet three criteria: they’re actively maintained or stable on Resolve 19, they add something the native toolset doesn’t cover, and they’re fully free (or have a free tier that handles real workloads, not just demos).
One prerequisite: several plugins here are distributed through Reactor, a free open-source package manager for DaVinci Resolve. Install it first. It takes five minutes and unlocks most of the ecosystem.
Free DaVinci Resolve Plugins: Quick Reference
| # | Plugin | Category | Best For |
|---|---|---|---|
| – | Reactor | Prerequisite | Installing and managing all other plugins on this list |
| 1 | AutoSubs | Editing | AI subtitle generation directly on the Resolve timeline |
| 2 | Simon Says | Editing | Multilingual cloud transcription, 100+ languages |
| 3 | Highlight Window | Editing | Animated callout boxes for tutorials and screen recordings |
| 4 | Blanking Generator | Editing | Multi-format delivery from a single timeline |
| 5 | mLUT (free) | Color | LUT management with per-clip intensity, highlights, shadows |
| 6 | False Color | Color | Exposure checking with on-set monitor-style color map |
| 7 | Film Grain Generator | Color | Organic film grain in the Color page, no roundtrip needed |
| 8 | GR-44 Transitions | Motion | 630+ customizable transitions in a single install |
| 9 | mTracker 3D (free) | Motion | Planar 3D tracking without learning Fusion deeply |
| 10 | ReaPlugs Suite | Audio | EQ, compression, reverb, and noise reduction for Fairlight |
| 11 | TDR Nova | Audio | Dynamic EQ for dialogue, music, and location audio |
| 12 | Analog Obsession | Audio | Free analog-modeled compressors and tape saturators |
| 13 | Krock.io | Collaboration | Frame-accurate client review with Resolve timeline markers |
Reactor: The First Install You Should Make
Best for: Finding and installing almost every other free plugin on this list
Reactor is an open-source package manager built specifically for DaVinci Resolve. Think of it as the plugin library that Blackmagic Design didn’t build but the community did. Hundreds of fuses, macros, templates, and tools are distributed through it, organized by category and filterable by Resolve version.
Installation is a one-time process that takes about five minutes. After that, adding or removing plugins happens without manually hunting for download links or moving files into the right system folder.
It’s free, community-maintained, and the single biggest time investment that pays back across every project after. If you’re still getting oriented inside Resolve’s native structure, understanding DaVinci Resolve power bins is worth a few minutes before you start layering in third-party tools.
Best Free DaVinci Resolve Plugins for Editing
1. AutoSubs
Best for: Editors delivering subtitled content regularly
Subtitles are one of those tasks that look straightforward until you’re doing them on deadline. AutoSubs uses AI to analyze your audio track, generate a transcript, and place captions directly on the DaVinci Resolve timeline as a subtitle track.
The free version handles single-language workflows without any file export or roundtrip. You stay in Resolve, the captions appear on the timeline, and you review and correct rather than type from scratch.
Consider what that shift looks like in practice: Maya, a documentary editor working for a three-person production company, was spending five to seven hours per film adding subtitles in a separate tool, then importing the .srt file back and fixing sync issues. After switching to AutoSubs, that dropped to 90 minutes of AI-assisted review. On a ten-project year, that’s weeks of time recovered.
2. Simon Says
Best for: Teams handling multilingual content or high-volume captioning
Simon Says connects DaVinci Resolve to a cloud transcription pipeline supporting over 100 languages. Unlike AutoSubs, which processes locally, Simon Says sends audio to remote servers for faster turnaround on long-form content and better accuracy on technical vocabulary, heavy accents, and overlapping dialogue.
The free tier covers a limited number of transcription minutes per month. For solo editors with standard volume, that ceiling is enough. For studios or agencies handling multiple multilingual projects, the paid tier is the right call.
3. Highlight Window
Best for: Tutorial creators, screen recording editors, explainer video teams
Highlight Window is a free template that adds an animated highlight box to your footage, pointing viewer attention to a specific region of the frame. It’s the standard tool for directing eyes to a button, a chart element, or a UI interaction without opening After Effects.
Size, shape, animation style, blur intensity, and color are all adjustable after install. It lives in your Effects library like a native Resolve tool once added. Available through Reactor.
4. Blanking Generator
Best for: Editors delivering across multiple aspect ratios
If you’re cutting the same project for Instagram (9:16), cinema (2.39:1), and broadcast (16:9), Blanking Generator removes the manual cropping work. It adds black bars or custom fills to any aspect ratio without creating a separate timeline or nested sequence for each format.
Available through Reactor. Small install, significant time saving on multi-platform deliverables.
Best Free DaVinci Resolve Plugins for Color Grading
5. mLUT by MotionVFX (Free Version)
Best for: Colorists who work with LUTs on every project
mLUT is the standard LUT management plugin in DaVinci Resolve color workflows, with per-clip controls that go beyond Resolve’s native LUT browser. The free version gives you a dedicated interface for applying LUTs to clips, with per-clip control over highlights, shadows, midtones, and contrast on top of the LUT itself.
It loads faster than Resolve’s native LUT browser and keeps clip-level adjustments organized in a way the native Color page doesn’t. MotionVFX keeps the free version fully functional. The paid upgrade adds their library of pre-built LUTs, which you can skip entirely if you have your own.
6. False Color by timeinpixels
Best for: Camera operators and colorists checking exposure before the grade
False Color converts your footage into a visual exposure map, using color ranges to show under- and overexposed regions instantly. It’s the same tool used on professional on-set monitors, running natively inside Resolve’s Color page.
For anyone grading log or RAW footage, this is not optional. It removes the guesswork from whether a highlight is clipped or just bright, and it catches exposure issues before the grade rather than during client review.
Available free on the Blackmagic Design forum and through Reactor.
7. Film Grain Generator
Best for: Editors adding organic texture to clean digital footage
Overly clean digital footage often needs texture to feel like it was shot on film. Film Grain Generator adds realistic, scalable grain directly in the Color page, with controls for size, intensity, and variation per clip. No After Effects roundtrip required.
It’s a Fusion-based node that renders inside Resolve. The free version available through community resources is sufficient for most commercial and broadcast deliverables.
Best Free DaVinci Resolve Plugins for Motion Graphics
8. GR-44 Transitions
Best for: Editors who need professional transitions without building them in Fusion
GR-44 is a community transition pack with over 630 transitions in a single install. They’re organized by type (cuts, slides, glitches, zooms, and more) and are fully customizable after the fact.
The install takes longer than a standard plugin because you’re loading a large macro library, but it’s a one-time process. After setup, transitions show up in your Effects library like native tools.
Note: GR-44 works best on Resolve Studio because of GPU rendering dependencies. Most transitions work on the free version of Resolve, but some require Studio’s rendering pipeline.
9. mTracker 3D by MotionVFX (Free Version)
Best for: Editors who need basic 3D tracking without learning Fusion deeply
mTracker 3D’s free version handles planar tracking for standard use cases: adding titles that follow a surface, tracking product placements, following a moving object across the frame. It’s considerably easier to use than Resolve’s native Fusion tracker for editors who aren’t Fusion specialists.
The paid version handles complex scenes with heavy camera shake or lens distortion. Most commercial, corporate, and social content stays well within what the free tier handles.
Best Free DaVinci Resolve Plugins for Audio
10. ReaPlugs Suite by Cockos
Best for: Editors handling their own audio mix without a dedicated sound designer
ReaPlugs is a full suite of professional-grade audio plugins that install as VST plugins inside DaVinci Resolve’s Fairlight page. Originally developed for the Reaper DAW, they’re used in professional broadcast audio workflows and available entirely free.
The suite includes:
- ReaEQ: Parametric equalizer with unlimited bands
- ReaComp: Compressor with full sidechain support
- ReaDelay: Multi-tap delay with host-tempo sync
- ReaVerb: Convolution reverb using real-room impulse responses
- ReaNoise: Basic noise reduction for dialogue cleanup
These are not artificially limited tools. Cockos releases them free because their revenue comes from Reaper itself, and the plugin suite serves the broader audio community. Install them by dropping the files into your system’s VST folder and pointing Fairlight to the directory.
11. TDR Nova by Tokyo Dawn Labs
Best for: Editors who need a versatile EQ with dynamic response
TDR Nova is a free dynamic equalizer that functions as both a standard parametric EQ and a dynamic EQ that responds to audio levels, similar to multiband compression. It’s widely used in podcast post-production and broadcast audio.
The free version is fully functional for dialogue, music mixing, and location audio cleanup. The paid “GE” version adds advanced modes for mastering work, but most video and broadcast audio stays within the free tier. Download directly from Tokyo Dawn Records.
12. Analog Obsession Free Bundle
Best for: Editors chasing a warmer, more analog character in their mix
Analog Obsession makes a rotating collection of free analog-modeled audio plugins: compressors, EQs, saturators, and tape emulators. They’re updated frequently and used by professional mixers working on commercial projects.
Free downloads are available on their Patreon. The entire free library requires no paid subscription. A free follow unlocks the full collection.
Best Free DaVinci Resolve Plugin for Client Collaboration: Krock.io
Best for: Editors who review footage with clients or remote creative teams
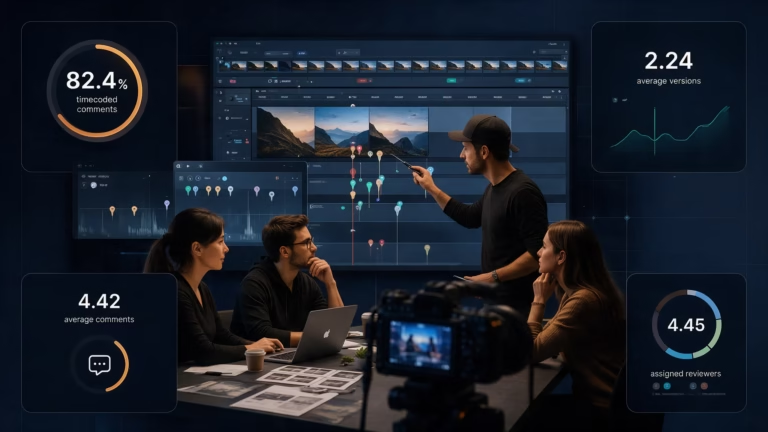
Here is the workflow most editors live in. You finish a cut, export to H.264, upload to Dropbox, paste a link into an email, wait three days, and receive back a paragraph that says “the pacing feels slow in the second half” with no timecode. You guess, you revise, you send another export, and the cycle repeats.
Krock.io’s DaVinci Resolve review plugin replaces that cycle entirely. It integrates directly into Resolve Studio’s interface, lets you upload footage and share a review link with clients, and pulls timecoded, frame-accurate feedback back into your timeline as markers. The client watches in their browser, clicks on the exact frame where they have a note, and that comment appears at the right timecode on your Resolve timeline.
No client account required. No software for them to download. A link, a browser, and a comment.
Marcus, a motion designer at a mid-sized agency, was averaging four revision rounds per client project before his team switched to Krock.io. Not because the edits were bad, but because feedback was vague and scattered. After switching, revision rounds dropped to two, and the first round was faster because every comment was specific and timestamped. A four-week feedback cycle became a nine-day one.
The Krock.io plugin is free to install. The free plan covers two active projects with unlimited reviewers, which is enough to run a complete production round from upload through approval. No credit card required to start.
For teams who’ve outgrown scattered email feedback, this is where the biggest time savings come from. Not a new color tool or a transition pack. Getting feedback organized and visible to everyone at once changes the math on how long a project actually takes.
Check out the full video proofing workflow to see how it fits into a professional delivery pipeline, or read the DaVinci Resolve integration overview for specifics on how the plugin connects to your timeline.
A note on requirements: Krock.io’s DaVinci Resolve plugin works with DaVinci Resolve Studio (the paid version, $295 one-time). If you’re running the free version of DaVinci Resolve, this integration won’t be available. For professional client-facing work, Resolve Studio is already the standard.
How to Install Free Plugins in DaVinci Resolve
Installation method depends on the plugin type.
For Reactor-distributed plugins:
- Download and install Reactor from reactionerx.com
- Open Reactor from the Workspace menu inside Resolve
- Browse by category or search by name
- Click Install
For manually downloaded fuses and macros:
- Download the .fuse, .drfx, or .setting file from the plugin’s source
- Place it in the correct folder:
- Mac:
~/Library/Application Support/Blackmagic Design/DaVinci Resolve/Fusion/Fuses/ - Windows:
C:\ProgramData\Blackmagic Design\DaVinci Resolve\Fusion\Fuses\
- Mac:
- Restart DaVinci Resolve
- The tool appears in your Effects library or Fusion node browser
For VST audio plugins (Fairlight):
- Install the .vst or .vst3 file to your system VST directory
- In Fairlight, open Preferences and run a VST scan
- The plugin appears in the Fairlight Effects browser
For integration plugins like Krock.io:
Download the installer from the Krock.io integration page and run the setup wizard. It connects to your Krock.io account and appears inside Resolve’s interface once active.
Building Your Free Plugin Stack
You don’t need all 15 of these installed before your next project. A practical starting stack by workflow type:
Solo editors, personal projects:
- Reactor (manages everything else)
- AutoSubs (subtitles)
- mLUT free (color)
- ReaPlugs (audio)
- GR-44 (transitions)
Studio and agency editors working with clients:
- Everything above, plus Krock.io, the DaVinci Resolve collaboration plugin that handles client feedback, for the review workflow
The difference between the two stacks is the feedback loop. Solo editors deal with their own revisions. Agency editors deal with client feedback cycles that can stretch projects by weeks when they’re managed through email.
Getting that part of the workflow under control is worth more than any color tool on this list. A full comparison of video review software is worth reading if you’re evaluating your options beyond plugins.
Frequently Asked Questions
What is the best free plugin for DaVinci Resolve?
Reactor is the best starting point. It’s a free package manager that lets you browse, install, and update other DaVinci Resolve plugins without manually downloading files. From there, AutoSubs (subtitles), mLUT (color), ReaPlugs (audio), and GR-44 (transitions) round out a complete free stack.
Are DaVinci Resolve plugins free to use commercially?
Most of the plugins in this guide, including Reactor, AutoSubs, mLUT, and ReaPlugs, are free for commercial work under their respective licenses. Always check the specific plugin’s license page before using it on paid client projects, since terms vary by developer.
Do free DaVinci Resolve plugins work with the Studio version?
Yes. The plugins covered here are compatible with both the free and Studio versions of DaVinci Resolve 19. None require the paid Studio license to function.
How many plugins should I install in DaVinci Resolve?
Start with one, Reactor, since it manages the rest. Most editors land on 4-6 plugins covering color, audio, transitions, and client review before the stack feels complete. Installing more than that often just adds clutter without adding capability.
The Bottom Line on Free DaVinci Resolve Plugins
Free does not mean limited. A fully free plugin stack in 2026, Reactor, AutoSubs, mLUT, ReaPlugs, GR-44, and Krock.io for client review, competes with paid alternatives that cost hundreds per year.
The tools that save the most time aren’t always the most visible. Color tools improve the grade. Transition packs speed up cuts. But the plugin that eliminates four days of email back-and-forth per project changes the math on what your actual workload looks like.
Start with Reactor. Add one tool at a time. The right plugins will make themselves obvious within a few projects.
Ready to cut your client review cycle in half? Start a free Krock.io account and connect it to your Resolve workflow today. Two projects, unlimited reviewers, no credit card required.