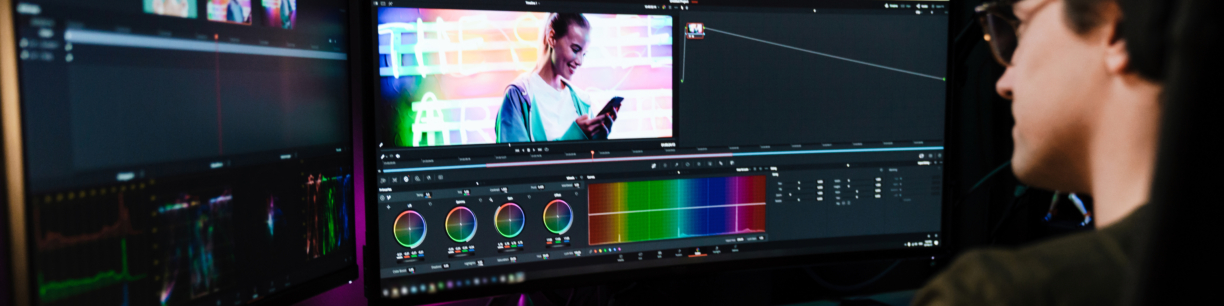


The 10 video editing tricks that professional editors actually rely on: J-cuts and L-cuts for invisible edits, 4K punch-ins as a free second camera, proxy workflows for smooth playback on any machine, match cuts, J/K/L keyboard navigation, AI color grading for fast rough passes, AI noise reduction, DaVinci Resolve Power Bins and Remote Grades, color-coded timelines, and centralized client feedback to cut revision rounds in half. These work across Premiere Pro, DaVinci Resolve, and Final Cut Pro — with DaVinci-specific tricks called out clearly where they apply.
Most editors hit a wall around year two. You know the basics, you finish projects on time, but every edit still takes roughly the same amount of effort. The editors who keep improving aren’t working harder. They’ve built a set of habits and techniques that compound over time — some craft tricks, some workflow tricks, and a few that feel almost like cheating once they become second nature.
1. J-cuts and L-cuts make your edits invisible
J-cuts and L-cuts are consistently underused by editors in their first few years. Once you start using them, you’ll wonder how you ever made clean edits without them.
A J-cut means the audio from the next scene starts before the video cuts to it. A L-cut means the audio from the previous scene continues playing after the video cuts away. Both work because our brains process audio faster than video. When audio leads the cut, the edit disappears.
Compare these two interview sequences: standard cut = video and audio change simultaneously, viewer feels every splice. J-cut version = you hear the interviewer ask the next question while still watching the subject think, then cut to the new shot. The transition feels natural because audio prepared the brain for what’s coming.
Marcus had been editing corporate interviews for two years when a mentor pointed out that every one of his cuts was a hard cut. He spent one weekend re-editing his reel using only J-cuts and L-cuts. His next client specifically mentioned that the pacing felt “smooth and professional.” Nothing else changed.
How to do it:
- Premiere Pro: In the timeline, hold Alt (PC) or Option (Mac) and drag just the video layer of a clip to create a split edit.
- DaVinci Resolve: Use the Trim tool (T) and drag the audio and video tracks independently after unlinking them.
- Final Cut Pro: Use the Blade tool (B) to cut only the audio or video, then ripple trim each independently.
Apply J-cuts whenever you’re cutting between interview clips, or any time dialogue connects two scenes. Apply L-cuts when you want to hold on a reaction shot while the off-screen voice continues.
2. The 4K punch-in gives you a free second camera
If you shot in 4K and your delivery format is 1080p, you have a free second camera built into every clip. A 4K frame has four times the pixel information of a 1080p frame, which means you can zoom in up to 200% and still deliver a sharp HD image.
Use this to:
- Turn a wide shot into a medium shot mid-interview, removing the need to cut
- Reframe a shot where the subject moved out of position
- Create subtle push-in or pull-out moves on static footage
- Fix eye-line problems by slightly zooming and shifting frame
The technique that matters here is matching the crop. If you’re cutting between a wide and a punched-in version of the same clip, make sure the subject occupies roughly the same screen position in both versions. A mismatch in subject placement is what makes the punch-in look like an edit.
In DaVinci Resolve: Use the Input Sizing panel in the Inspector to scale and reposition without affecting your timeline resolution. This is non-destructive and easily keyframed for slow push-ins.
In Premiere Pro: Use the Motion panel in Effect Controls. Scale up to around 150-180% and adjust Position to reframe.
3. Proxy workflow lets you edit anything on any machine
Proxies are lightweight, low-resolution copies of your high-resolution source files. Your NLE edits from the proxy, but exports from the original file. The result: 8K RAW footage that stutters on playback becomes smooth 422 LT proxy footage you can scrub through in real time.
Elena had been editing a 6-episode documentary shot in 8K on a MacBook Pro from 2021. Every timeline had dropped frames. She was spending more time waiting for playback to catch up than actually editing. When she set up a proxy workflow in DaVinci Resolve, the problem disappeared in 20 minutes. She finished the series two weeks ahead of schedule.
In DaVinci Resolve: Right-click any clip in the Media Pool, select “Generate Proxy Media,” choose your format (Apple ProRes 422 LT is a good default), and let it run. Enable proxy playback via Playback > Use Proxy Media.
In Premiere Pro: Right-click clips in the Project panel, select “Proxy > Create Proxies,” pick a lower-resolution format, and toggle proxies on/off with the proxy button in the Program Monitor.
In Final Cut Pro: In the inspector, select the clip and choose Transcode Media > Create Proxy Media.
Storage note: an 8K ProRes RAW clip at roughly 100 MB/sec reduces to around 8-12 MB/sec as a ProRes 422 LT proxy. You’re keeping the original untouched while working from files that are 8-10x smaller. That’s not a trick. That’s just good practice.
4. Match cuts add cinematic impact to any project
A match cut transitions between two shots that share a visual, physical, or conceptual similarity. The most famous example is from 2001: A Space Odyssey, where a bone thrown into the air cuts to a spacecraft. The shape matches, the motion matches, and the cut spans 4 million years in two frames.
You don’t need a Stanley Kubrick budget to use this. Match cuts work in:
- Shape matches: Cut from a close-up of a coffee cup rim to a drone shot of a circular building
- Motion matches: Cut from a person sitting down in one location to a person sitting down in another
- Action matches: Cut from someone throwing something to the landing of that throw in a different location
- Color matches: Cut between two shots with a dominant color element in the same screen position
The practical value is transition quality. Match cuts feel intentional and polished in a way that most straight cuts don’t. For a three-minute brand video or a 30-second social ad, one or two strong match cuts signals craft.
How to find them: When you have a long interview or B-roll clip, look for moments of motion or strong shapes. Build a short B-roll library organized by shape and motion type so you can reach for them quickly.
5. One-hand editing with J, K, L and ripple delete
If you’re still using your mouse to play, stop, and navigate the timeline, you’re leaving speed on the table. The J/K/L keys have been the core navigation system in professional editing since the Avid days, and they work in every major NLE.
- L: Play forward (press multiple times to increase speed: 2x, 4x, 8x)
- K: Stop
- J: Play backward (same speed multiplier logic as L)
- K + L held together: Slow-motion forward
- K + J held together: Slow-motion backward
The companion trick is ripple delete, which removes a clip from the timeline and closes the gap in one action. In Premiere Pro, the default is Shift+Delete. In DaVinci Resolve, it’s Shift+Backspace. In Final Cut Pro, it’s Shift+Delete.
Add a custom shortcut for “Add Edit” (splits the clip at the playhead) and you have a one-hand editing system. Play with L, stop with K, split with your custom key, ripple delete with Shift+Delete. Keep your right hand free for the mouse.
DaVinci Resolve speed tip: Resolve’s Speed Editor hardware controller is built around JKL editing with physical jog and shuttle wheels. If you edit in Resolve regularly, it’s worth the investment. But the keyboard shortcuts work just as well.
6. AI color grading handles the grunt work in minutes
Color grading used to mean spending 45 minutes on a rough grade before you could even start creative work. AI tools have made that first pass nearly instant.
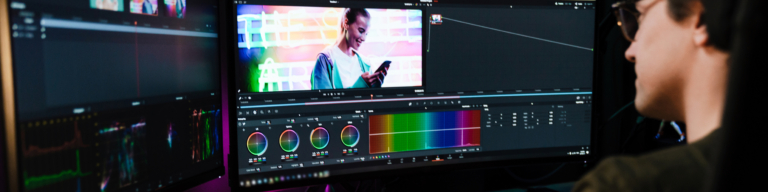
DaVinci Resolve‘s Color Match: In the Color page, right-click on a node and select “Color Match.” Point it at a reference still or another clip, and Resolve will match the color profile of your footage to the reference. It takes about ten seconds. The result isn’t perfect, but it gets you to 80% in a fraction of the time.
DaVinci Resolve’s Auto Color: Also on the Color page, right-click any node and select “Auto Color.” Resolve analyzes the clip and applies a basic correction for exposure and white balance. Good for log footage that needs a starting point before you apply a LUT.
DaVinci Resolve’s Magic Mask: On the Color page, use the Magic Mask tool to automatically isolate subjects, sky, or background using AI-powered tracking. This replaces manual rotoscoping for basic isolation tasks. Select the type of subject (person, sky, vehicle), click to apply, and Resolve tracks across the clip.
Adobe Premiere Pro’s Auto Tone (in the Lumetri panel): Applies an automatic tonal correction based on the clip’s histogram. Good as a starting point for mixed lighting conditions.
The rule here is simple: use AI for the rough pass, then adjust manually. An AI grade that takes you to 80% in 5 minutes, followed by 15 minutes of manual refinement, beats a 60-minute manual grade from scratch every time.
Ready to get your cuts to clients faster than ever? Krock.io’s video proofing lets you share a grade for feedback the moment you finish it, with frame-accurate comments from reviewers who don’t need to log in.
7. AI noise reduction cleans problem audio instantly
Bad location audio is one of the most common reasons an otherwise good edit gets sent back. Air conditioning hum, traffic noise, room echo, HVAC rumble. These problems used to require either a skilled audio engineer or a re-record. Now they take about 30 seconds.
DaVinci Resolve’s Voice Isolation (Fairlight page): Click on a dialogue clip, navigate to the Inspector, and enable Voice Isolation. Resolve’s FairlightAI separates the primary voice from background noise with impressive accuracy. You can dial in the amount of isolation, and for most location audio problems, a setting between 60-80% cleans the track without making it sound processed.
For more complex audio issues, use Dialogue Separation in Resolve’s Fairlight, which isolates dialogue, room tone, and noise into separate components you can balance independently.
Adobe Premiere Pro with Enhance Speech: Under the Audio panel, apply the Enhance Speech effect to any dialogue clip. Adobe’s AI-powered noise reduction is particularly effective for conference room echo and traffic rumble that sits underneath clear dialogue.
The key limitation with all AI noise reduction: it works best when the original dialogue is clean and clear, and the noise is consistent background noise. For heavily distorted audio or clipping, no AI will save you. Garbage in, garbage out.
8. DaVinci Resolve Power Bins and Remote Grades save hours across projects
These two DaVinci Resolve-specific features are rarely set up by editors who haven’t been shown them, and they’re worth switching to Resolve for alone.
Power Bins persist across every project in DaVinci Resolve, not just the current one. If you build a library of stock music, sound effects, title templates, LUTs, and graphic elements in a Power Bin, those assets are available the moment you open any new project. You stop hunting for your own files.
Right-click in the Media Pool and select “Add Power Bin.” Drag your reusable assets in. From that point forward, every project you open in Resolve will have access to them.
Remote Grades solve a specific but painful problem: when you grade one clip and later realize that grade needs to change across every instance in the timeline. With Remote Grades, a color correction applied to one clip automatically updates across all clips using that same Remote Grade node. Change it once, it changes everywhere.
To use Remote Grades: On the Color page, right-click a node and select “Remote Grade.” Any other clip you apply that Remote Grade to will inherit all changes you make to the original.
For editors managing long-form content with consistent scenes or recurring graphic elements, these two features alone justify making DaVinci Resolve the primary NLE. If you review work through Krock.io, the DaVinci Resolve integration lets you send a client review link directly from your Resolve project without switching tools. More on the full capability of DaVinci Resolve Power Bins if you want a deeper look at how to set them up.
9. Color-code your timeline before it gets complex
This one sounds trivial. It isn’t. The editors who color-code their timelines consistently finish complex projects faster and make fewer versioning mistakes than those who don’t.
The system is simple. Before you start building a long-form timeline, assign colors by clip type:
- Interview/talking head: Blue
- B-roll: Green
- Music: Yellow
- Sound effects and ambience: Orange
- Titles and graphics: White or gray
- Pickup shots or selects: Purple
Setting this up on a 30-minute documentary takes about ten minutes. When you’re hunting for a specific sound effect at 2 a.m. before a deadline, you find it in three seconds instead of scrolling through 200 clips all the same color.
The secondary benefit is error prevention. A misplaced clip stands out visually in a color-coded timeline. Interview audio accidentally on the wrong track shows up immediately. Wrong-version exports usually happen when the timeline is a visual mess and an editor grabs the wrong clip. Color-coding reduces that.
In DaVinci Resolve: Right-click any clip in the timeline, select “Clip Color,” and choose from the color menu. You can also set default colors by clip type in the timeline settings.
In Premiere Pro: Right-click any clip, select “Label,” and choose a color.
In Final Cut Pro: Right-click a clip in the Browser, select “Assign Role,” and use the role colors that already appear in the timeline.
10. Centralizing client feedback is the video editing trick nobody talks about
The first nine tricks make you a faster, more precise editor. This one makes the whole revision cycle shorter.
Here’s what usually happens: you finish a cut and send it for review. The client sends three emails over the next two days. Your producer adds notes in a Slack thread. One stakeholder records a Loom video with six feedback points. The client’s boss has additional comments that arrive separately. Someone repeats a note from 48 hours ago because they didn’t know it had been addressed.
You now have five sources of feedback with some overlap, some contradiction, and no clear version number to tie them to. You make the changes you can find. You miss the ones buried in the email thread. You export what you think is version 3. It’s actually version 4 because of a minor fix you forgot to count.
This is not an unusual story. It’s the default experience for editors who collect feedback through email, Slack, and file-sharing links.
The team at Coastal Frame, a four-person production company in Chicago, had this exact problem on a series of eight brand videos in early 2025. They were on version 7 of a 90-second spot. The client had sent feedback in five different places. The lead editor had built a tracking spreadsheet just to manage the revisions. Delivery was three days late on a project that should have been straightforward.
When they switched to centralizing review in a single tool where clients could drop comments at the exact frame, every revision round got shorter. The lead editor’s spreadsheet disappeared. Clients couldn’t contradict themselves across threads because there was only one thread, attached to the exact frame they meant.
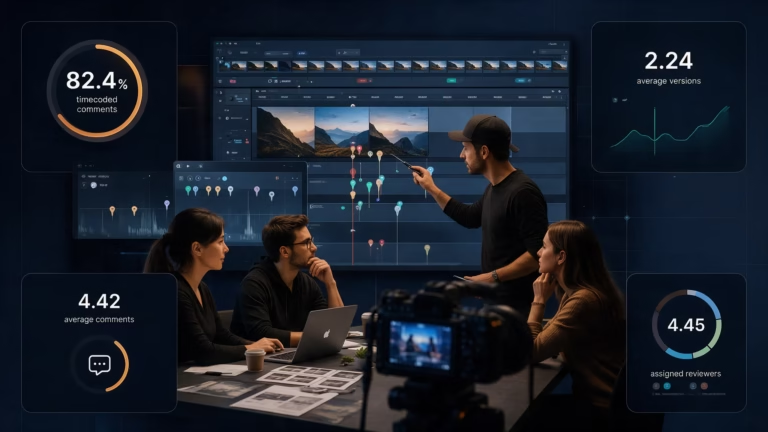
For video review without the revision chaos, Krock.io’s video proofing gives clients a review link that requires no login, drops frame-accurate comments directly on the cut, and shows every note in one place. Your team sees what changed, what was resolved, and what’s still open. You stop exporting the wrong version.
If you’re evaluating your options, the best video review software guide covers how different tools handle this problem at different team sizes.
Start your free trial at Krock.io, unlimited reviewers on every plan, no credit card required.
Frequently asked questions about video editing tricks
What are the most useful video editing tricks for beginners?
Start with J-cuts and L-cuts (they immediately improve the feel of any cut), then add a proxy workflow if you’re working with high-resolution footage. These video editing tips address the two most common beginner problems: jarring cuts and playback performance issues. Build from there.
Which video editing tricks work across Premiere Pro, DaVinci Resolve, and Final Cut Pro?
J-cuts and L-cuts, match cuts, J/K/L navigation, ripple delete, proxy workflow, and color-coded timelines all work in every major NLE. AI color grading and AI noise reduction have equivalents in Premiere and Resolve specifically. Power Bins and Remote Grades are DaVinci Resolve-exclusive features.
How do professional video editors speed up their workflow?
The short answer: they automate the grunt work (AI color, AI noise reduction, proxy generation), systematize their file management (Power Bins, color-coded timelines), master keyboard shortcuts so they rarely need the mouse, and build feedback loops that produce clear, consolidated revisions rather than scattered notes. The editors who are fastest aren’t necessarily more talented. They’ve removed more friction.
Do these video editing techniques work for short-form content and social video?
Yes. J-cuts and L-cuts matter even in 15-second Instagram Reels. Color-coded timelines help when you’re managing 30 short clips at once. Proxy workflow is especially valuable on mobile-shot 4K footage. The scale changes; the principles don’t.
Putting it together
Ten video editing tricks that compound over time. The first nine improve your craft and speed directly. The tenth removes the revision overhead that eats the time you save everywhere else.
Here’s the short list:
- J-cuts and L-cuts for invisible edits
- 4K punch-in for a free second camera
- Proxy workflow for smooth playback on any hardware
- Match cuts for cinematic transitions
- J/K/L and ripple delete for one-hand navigation
- AI color grading for fast rough passes (Resolve Color Match, Auto Color, Magic Mask)
- AI noise reduction for problem audio (Resolve Voice Isolation, Premiere Enhance Speech)
- DaVinci Resolve Power Bins and Remote Grades for cross-project efficiency
- Color-coded timelines for error prevention at scale
- Centralized client feedback to cut revision rounds in half
Pick one you’re not using. Build it into your workflow this week. Come back for the next one. That’s how editors actually improve.