Webhooks allow krock.io to automatically send real-time notifications to your other applications whenever important events occur in your projects. This powerful feature helps you build seamless workflows and keep your entire team in sync across multiple platforms.
What are webhooks?
A webhook is an automated message that krock.io sends to another application when a specific event happens. For example, a new comment is added or a project status changes. Instead of constantly checking krock.io for updates, webhooks push information to your other tools instantly.
Think of it like this: rather than repeatedly calling someone to ask, “Is it ready yet?” webhooks are like getting a text message the moment something is ready. It’s automatic, instant, and efficient.
Why use webhooks with krock.io?
Webhooks help you:
- Automate your workflow – Trigger actions in other apps without manual intervention
- Stay informed in real-time – Get instant notifications in Slack, email, or your preferred tools
- Integrate seamlessly – Connect krock.io with your existing tech stack
- Save time – Eliminate the need to manually sync information between platforms
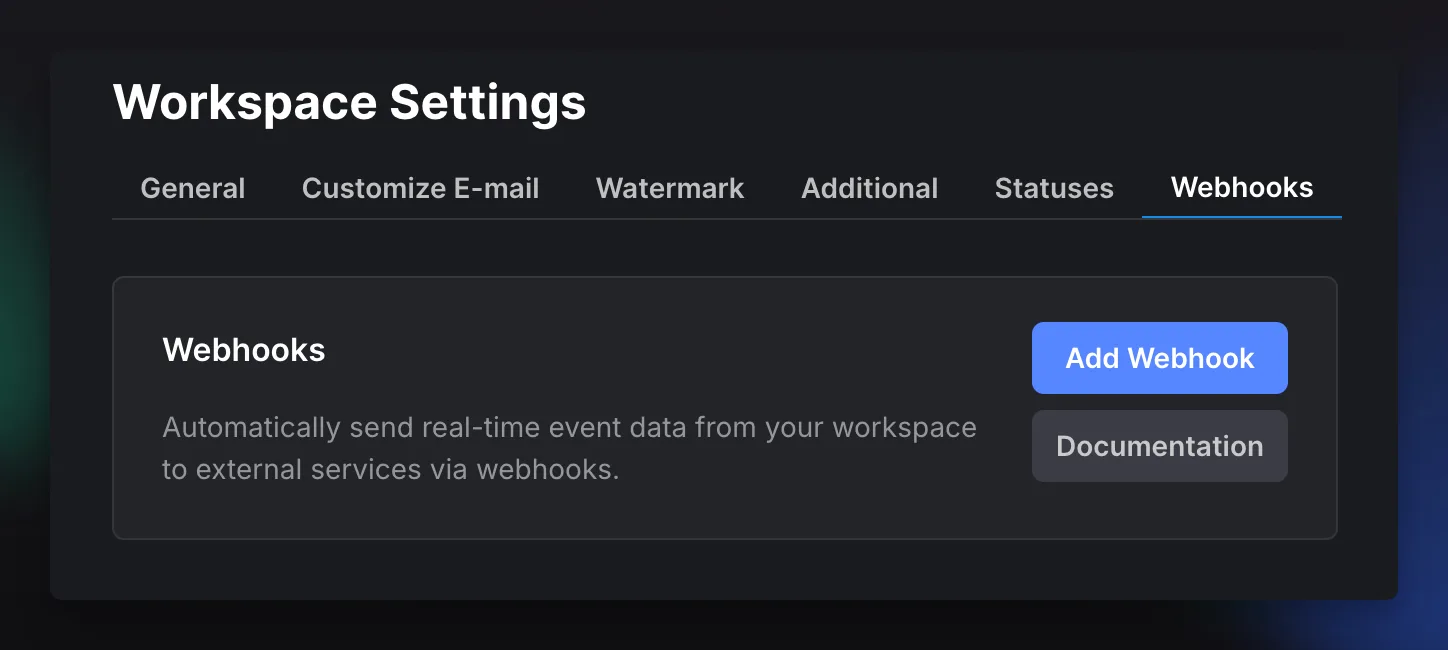
How to Access Webhooks in krock.io
Follow these steps to get started:
- Open Workspace Settings – Navigate to your workspace and click on the settings icon
- Go to the Webhooks tab – You’ll find this in the top navigation menu
- Click “Add Webhook”
Configuring Your Webhook
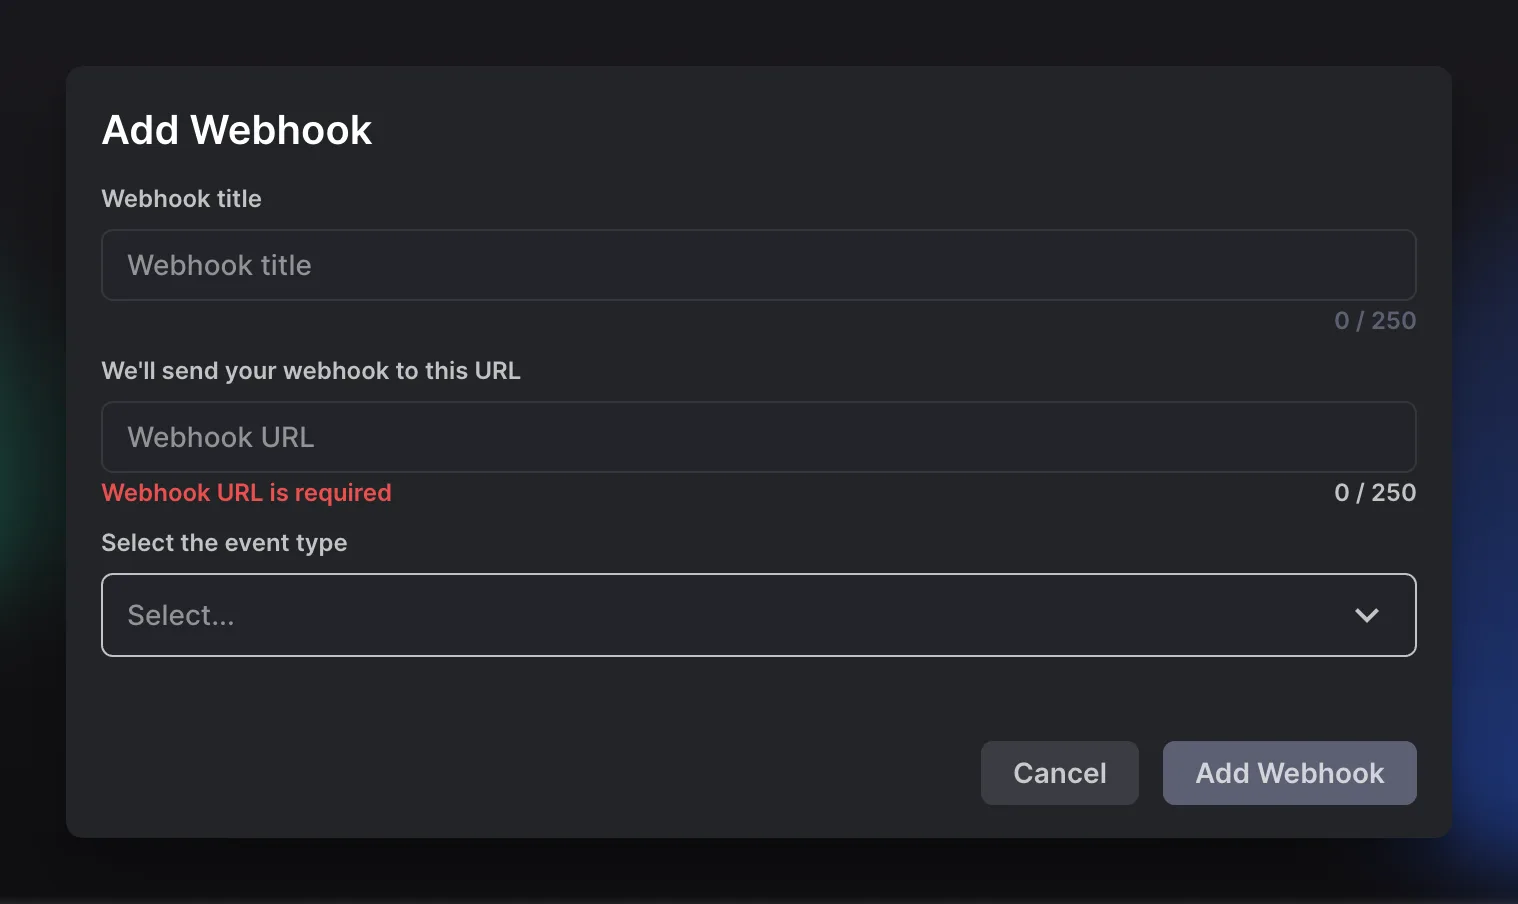
Webhook title: Give your webhook a descriptive name to help you identify its purpose later.
Webhook URL: Enter the endpoint URL where krock.io will send the webhook data. This is the destination address of the external service you want to connect to. The URL field is required.
Select the event type: Choose which events in krock.io will trigger this webhook.
Saving and Using Connector Parameters
To save a parameter and use it in future webhooks, you need to call the following method:
Endpoint: https://platform.krock.io/api/web/v1/webhook/save-connect-params
Method: POST
Body Content Type: Form-Data
This method requires three parameters:
- connectorName: The name of the property you want to save. This can be any name you choose, but avoid using spaces or special characters.
- connectorValue: The actual value you want to store.
- connector: A pre-formatted string that links to a specific data model in krock.io. When you receive a webhook response, you’ll see objects like
workspaceData,projectData, and others. Each of these objects contains aconnectorproperty that you can use here. By providing this connector, the value you’re saving gets attached to that specific data model.
How saved data appears in future webhooks
Once saved, your data will appear in the connectorObjects array the next time a webhook is triggered. This array contains all the instances you’ve saved for that particular connector.
Important to note: Each time you call this method with the same connector, it adds a new instance to the connectorObjects array rather than overwriting the existing one.
Practical example: Saving chat IDs in Discord
Let’s say you want to save Discord chat IDs so you can send messages to those chats later. Since each save adds a new entry to the array, you’ll need to:
- Loop through the
connectorObjectsarray - Check if the connector in each object matches the connector from the data model in your incoming webhook
- Use the matching entry to perform your action (like sending a message to that specific chat)
This approach ensures you’re working with the correct saved data for each webhook event.