The Krock.io Slack integration sends your project notifications straight into Slack, so your team knows the moment something changes — a new comment, a status update, or a file added to a project.
Slack is a messaging app built for businesses and teams. It keeps work conversations organized by topic in dedicated channels — all in one place, away from the noise of personal chats — which makes team collaboration fast and easy.
This guide covers two ways to connect them: the standard integration for personal notifications, and an advanced n8n setup that creates a dedicated Slack channel for every project.
How to enable Slack in Krock.io
- Go to your Profile on the left sidebar menu and click on Integrations.
- Find Slack, and click Connect.
- Choose the channel where you want to receive notifications from Krock.io and allow access.
Voila! You have successfully connected Slack to your Krock.io workspace.
How to disconnect Slack
- Go again to your Profile on the left sidebar menu, and click on Integrations.
- Find Slack, and click Disconnect.
- That’s it! You are no longer receiving Krock.io notifications on your Slack channel.
Advanced: send Krock.io notifications to a shared or per-project Slack channel
The standard integration above works at the account level. It sends each team member their own Krock.io notifications into Slack — you get updates from everyone else’s activity, but not from your own actions. That’s ideal for personal notifications, and every teammate can set up their own.
Sometimes, though, you want something different: one shared channel the whole team sees, or a dedicated Slack channel that’s created automatically for every new project. For that, you can connect Krock.io to Slack using n8n and webhooks.
With this setup, every time you create a project in Krock.io, the workflow automatically:
- creates a new Slack channel for that project,
- sets the channel topic to the project link,
- invites the team members you choose, and
- sends every new comment from that project into its dedicated channel.
Prefer to watch? Here’s the full video walkthrough:
Before you start
You’ll need:
- An n8n account (cloud or self-hosted).
- Admin access to your Slack workspace (to create a Slack app).
- Admin access to your Krock.io workspace settings (to create webhooks).
Step 1 — Download and import the workflow
Download the ready-made workflow, then import it into n8n:
In n8n, open the workflow menu, choose Import from File, and select the file you just downloaded.
Step 2 — Create the Slack app and add the required scopes
The workflow needs a Slack bot with the right permissions.
- Go to api.slack.com/apps and create a new app in your workspace. (Step-by-step video: How to create a Slack bot)
- Open OAuth & Permissions and add the Bot Token Scopes listed below.
- Install the app to your workspace, then copy the Bot User OAuth Token — you’ll paste it into n8n in Step 5.
Add all of the following scopes (every one is required):
| OAuth scope | What it lets Krock-bot do |
|---|---|
app_mentions:read |
View messages that directly mention @Krock-bot in conversations the app is in |
channels:join |
Join public channels in a workspace |
channels:read |
View basic information about public channels in a workspace |
channels:write.invites |
Invite members to public channels |
channels:write.topic |
Set the description (topic) of public channels |
chat:write |
Send messages as @Krock-bot |
chat:write.customize |
Send messages as @Krock-bot with a customized username and avatar |
groups:write |
Manage private channels Krock-bot has been added to, and create new ones |
im:write |
Start direct messages with people |
mpim:write |
Start group direct messages with people |
users:read |
View people in a workspace |
Step 3 — Create the webhook trigger in n8n
- In the imported workflow, open the Webhook trigger node. Keep its name exactly Webhook — the rest of the workflow references it by that name.
- Set the HTTP Method to POST.
- Copy the Test URL shown on the node.
Step 4 — Connect the webhook in Krock.io
- Open your Krock.io workspace settings → Webhooks.
- Click Create webhook, give it a name (for example, Slack n8n), and paste the Test URL you copied from n8n.
- Select the events you want to send to n8n (for example, project created and new comment).
- Once you’ve finished testing, copy the Production URL from the n8n Webhook node and create a second webhook in Krock.io with it. You can then delete the test webhook, or keep both — it doesn’t matter.
Step 5 — Add your Slack credentials to the workflow
- In n8n, open each Slack node in the workflow.
- Select your Slack credentials — or create a new one and paste the Bot User OAuth Token from Step 2.
- Where a field uses an expression, copy the value, switch the field to Expression, and paste it back in. Repeat for every node so they all point to your own channel and project data.
Step 6 — Publish, run, and test
- Save and publish the workflow, and make sure it’s active.
- Create a test project in Krock.io. The workflow should create the Slack channel, set its topic to the project link, and invite your chosen users.
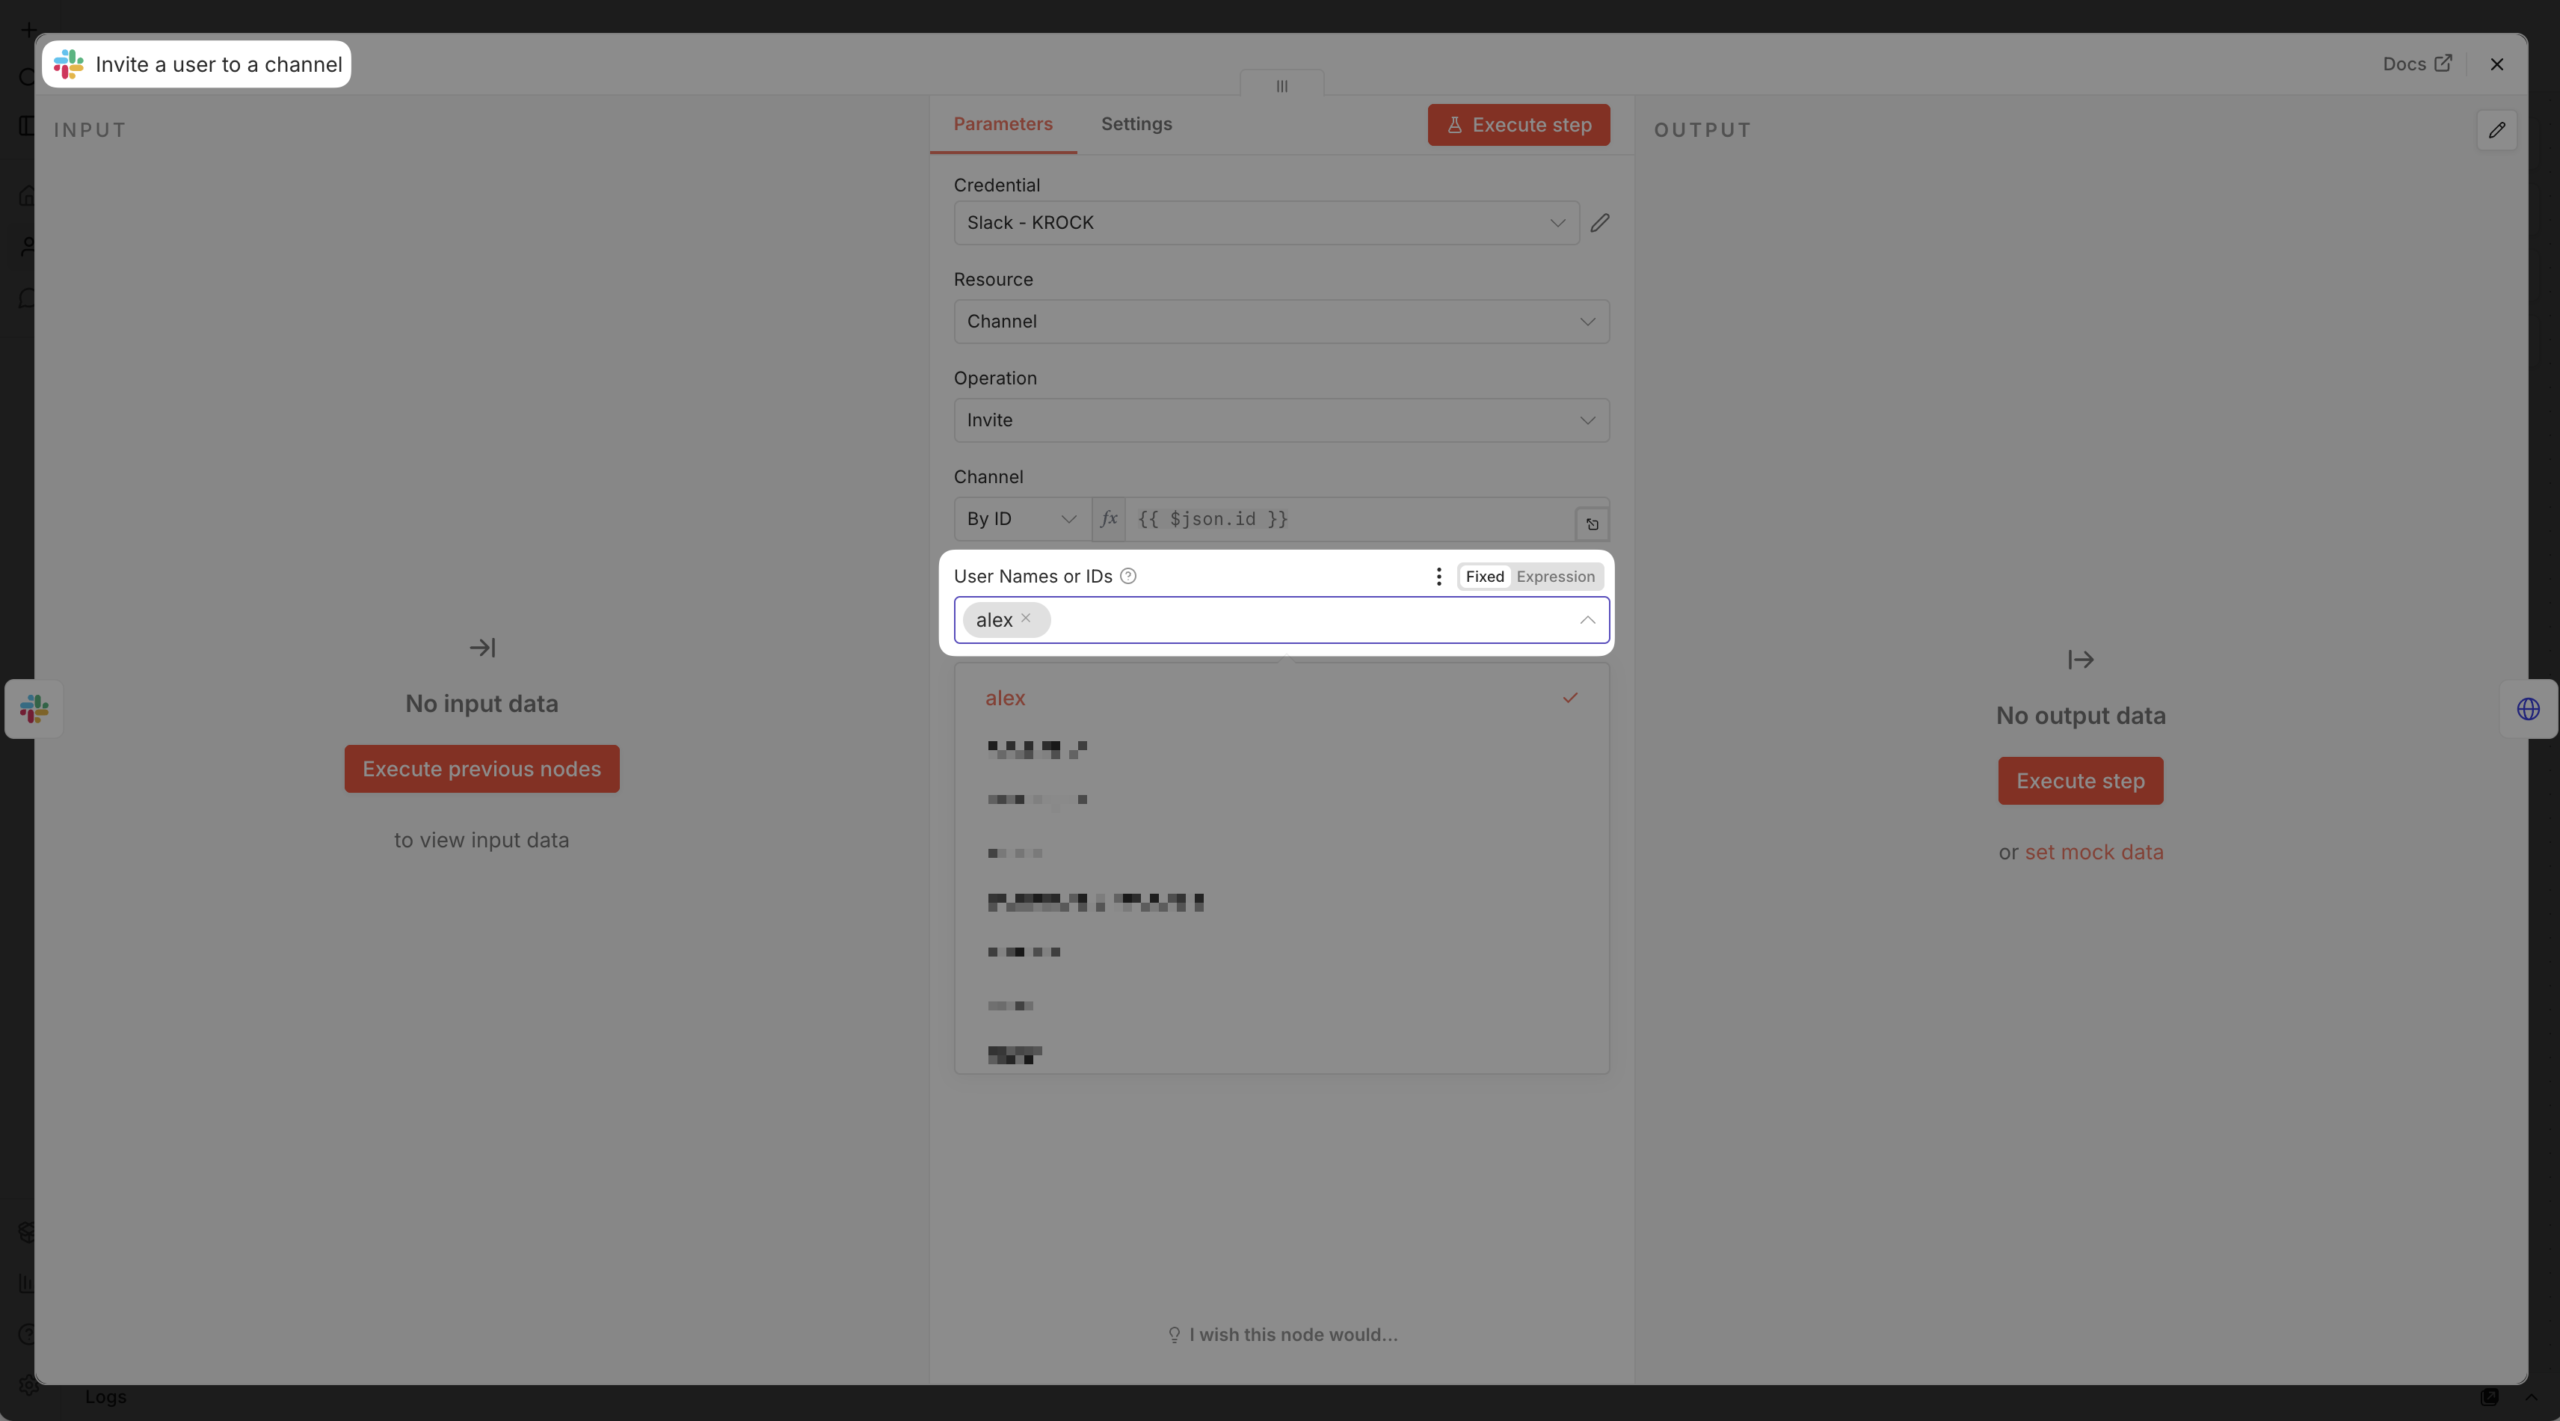
First run only: open the Invite a user to a channel node and pick your users. n8n reads your Slack user list the first time the workflow runs — after that, you can simply select who gets invited automatically.
- Add a comment on the project. It should appear in the project’s Slack channel, with a link back to it.
- Create a second project and add a comment there too, to confirm each project’s comments land in their own channel.
That’s it — your team now gets a dedicated Slack channel for every Krock.io project, with comments flowing in automatically.